1. Sketching
Step 1
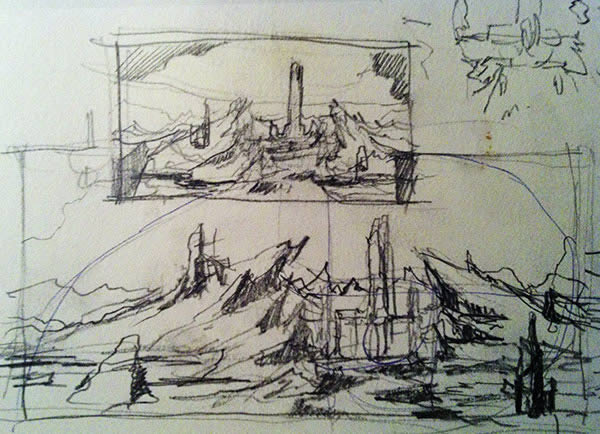
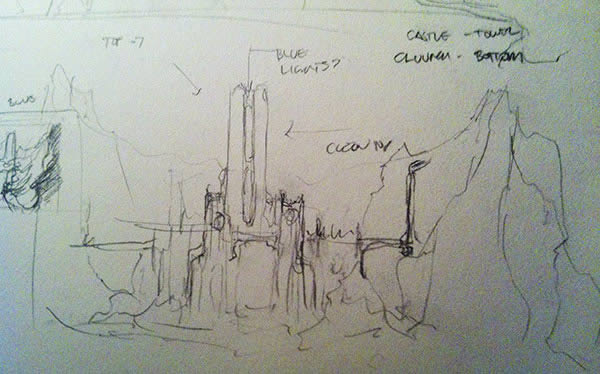
This first step allows us to brainstorm some ideas. In the beginning of this stage, we really have no clear direction. We just let our hands and mind do the talking. But if we have to capture an idea, we must try and do as much doodling as we can. It doesn’t matter what type of tool or medium you use just as long as you can express your ideas on paper, or in some cases, digital paper.
Tip: When sketching, it is encouraged that you try
and take your time to flesh out your ideas on paper. One way is to
create call outs to describe some parts of your sketches. Creating
variation based on look and perspective can give you a fresh new idea
on the same concept. Remember, there is no such thing as a ridiculous
idea, all ideas at this stage is useful. In our example sketches, added
notes and call outs were useful in describing certain details.
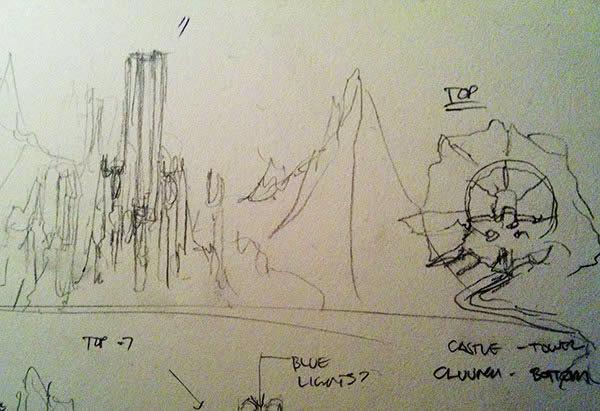
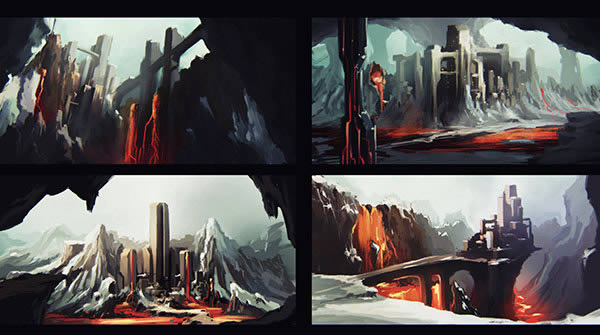
Step 2
Once we have done that, you can now start compiling all your ideas into 4 main concepts. Only choose the ones that you like. You have the option to refine each sketch, but keep it along the concept that you are aiming for. In our case, we want to create a castle enveloped by a snow mountain surrounded by lava, two contrasting ideas that can be a challenge to create.Choose what you think is the best among the 4 that you have made. Choose the one that can conveys your idea strongly. Refine the concept and add proper framing and composition. Altering or changing some parts to make it more pleasing to the eye. In some cases taking this final concept and creating different views of it can also help. There might be a better angle or perspective that you can "accidentally" discover while exploring your idea. In some ways, 3D can be a great tool at this stage, which leads us to.
2. Form Building
Form building is the next step to flesh out your ideas. Some mattepainters are great at creating form using hundreds of references, others prefer 3D. Whatever tool or step you might take, always consider the time that you will spend on creating your piece, especially with pressure from deadlines. This is a critical part since we might waste a lot of time if we press on the wrong direction.We start making our form by refining our composition. We take our initial sketch and overlay some common composition lines over it to refine the flow and look of our final image. Feel free to edit or transform your image at this stage.

2. Creating Mountains
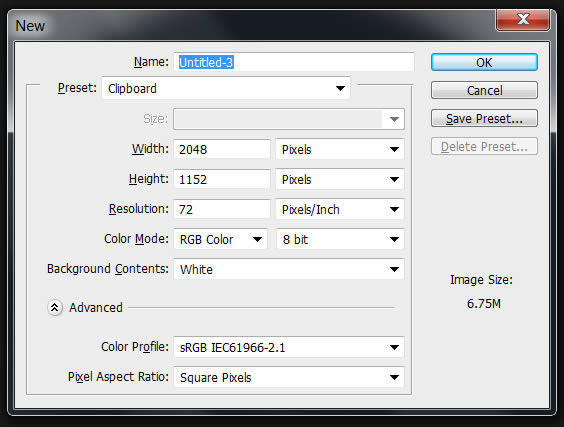
Before we begin, let’s create a new file.
Step 1
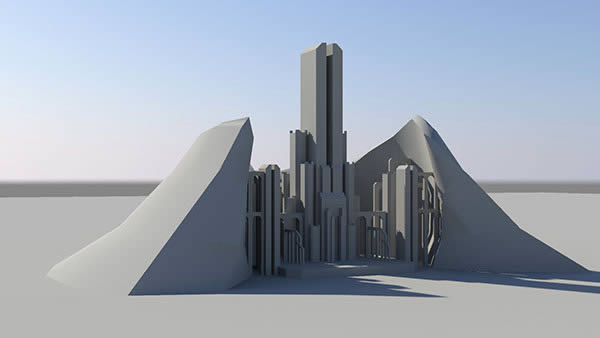
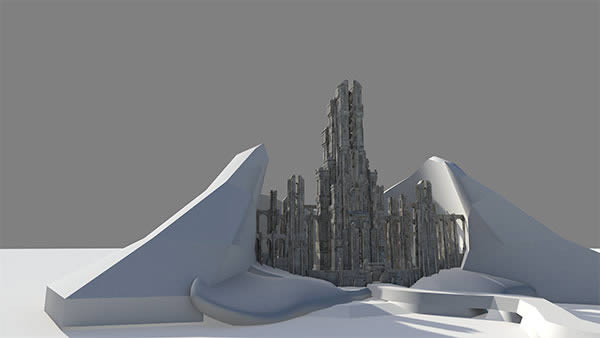
Now on to the Fun stuff! Let’s start off with the mountains. We are starting with the mountains because they are the biggest part of our painting. It is also the part that frames our Castle.First we will use our castle render as our base for the shape and look of the mountains (see 3D render image below). Then we will proceed with blocking the mountains really quickly to get an overall look and feel of the painting.
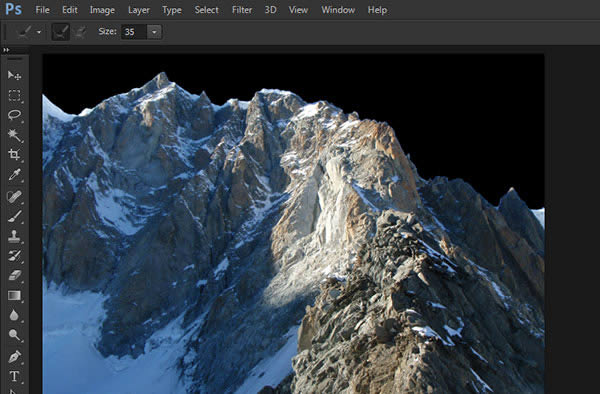
Step 2
Block the mountains with the reference image that we have provided. At this stage we are just free forming our painting. Grab any image that you think can work. This will be changed later on with a better image, we just need to see something really quickly. Use the Magic Wand Tool and quickly select the blue skies.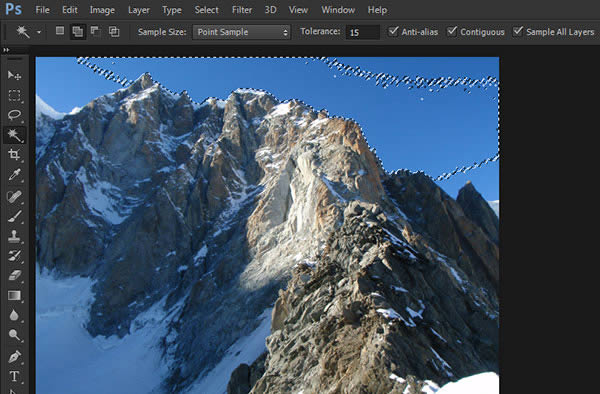
Step 3
Once that’s done, invert your selection (Shift + Command/Ctrl I) or going to tab menu "Select – Inverse." Once your selection is inverted refine the edge (Command/Ctrl + Alt + R) or tab menu (Select – Refine Edge) When you have set you settings, always tick "Remember Settings" to save your current settings. This is useful as you have a preset that can be edited faster especially if you have a slower computer.
Step 4
Add a "blocking" sky, it can be 2 or 3 variances of sky that can later be mixed or changed.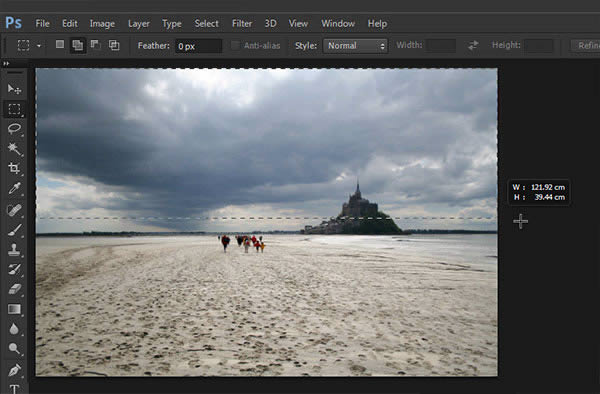

Step 5
Taking another blocking mountain image, masked it out and add it as a left side blocking piece for the mountain background.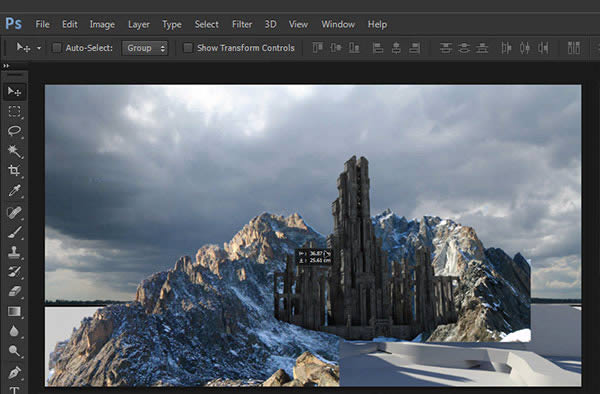
Step 6
Take another mountain from the references and use it to block out the furthest part of your painting. A simple soft brush can quickly integrate it with your current painting. Just be sure that you are choosing the right image that goes with your sky.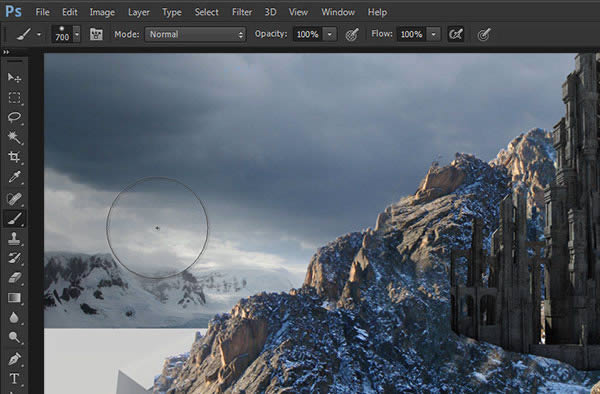
Step 7
Here is where everything starts to get interesting. At this point we are done with the preliminary blocking. We start off by creating our first perspective lines using the Pen Tool (P). Choose a side from the building, using it as a guide, click and drag your first point to the left side of the painting. Do this again and again until you can find where the vanishing point is. This will be our first vanishing point. Be sure to mark your vanishing point with a Guide Line.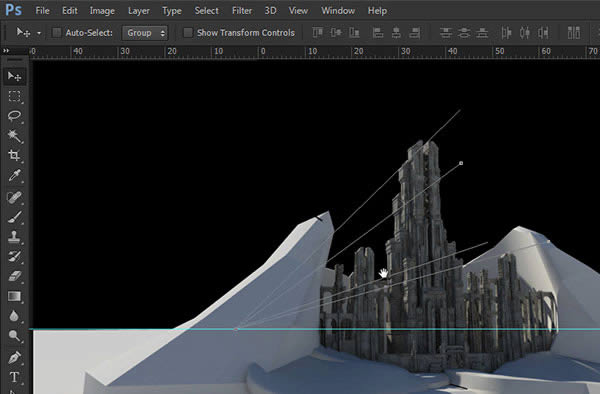
Step 8
Once you have set up your perspective lines, you can now start building up your main mountains. We start off with a mountain that has a more snow on it. It also comes from a set of images with the same character, enabling us to edit it faster and easier to integrate.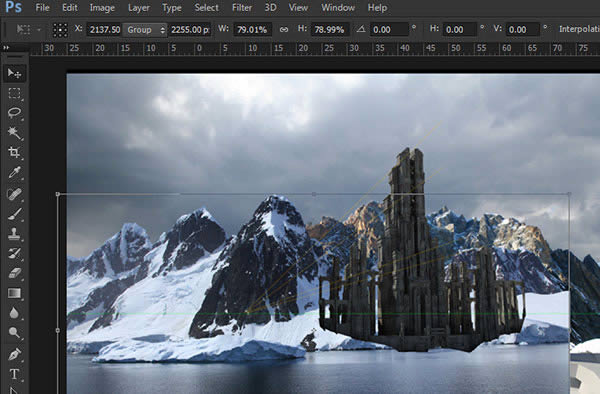
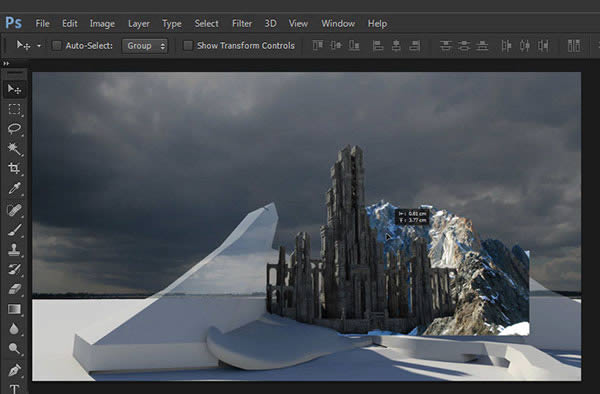
Step 9
Start transforming your mountain to follow our blocking render. Lower down the opacity of your pasted mountain and Right Click – Free Transform. It doesn’t have to be accurate, but try to keep the established look as much as possible.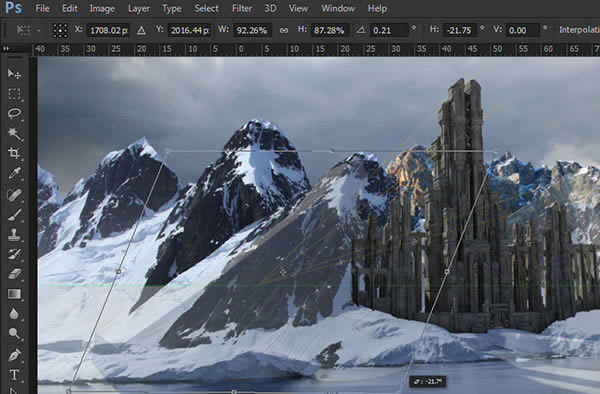
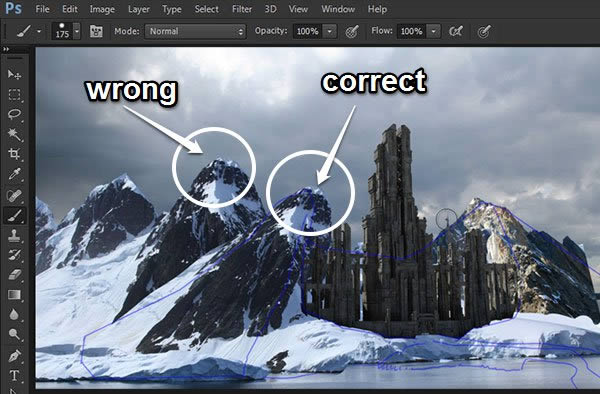
Step 10
Another way to get the form of your concept to your images is to create an outline of your existing blocking render. Just quickly paint over the outline of the 3D mountain on another layer.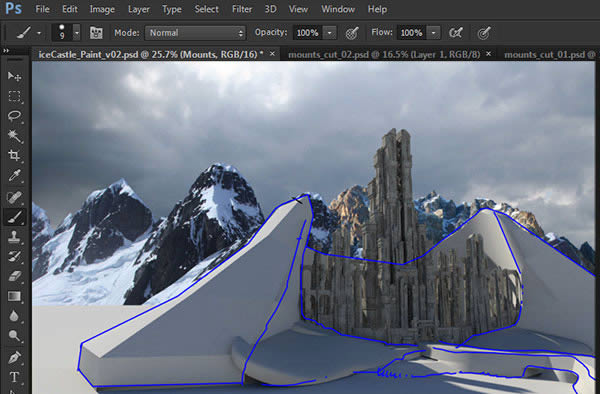
Step 11
Once that is done, you can go back and keep on transforming your reference images to reflect the outlines that you just created.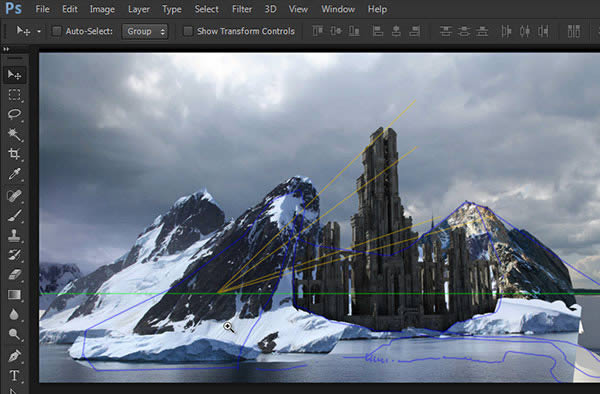
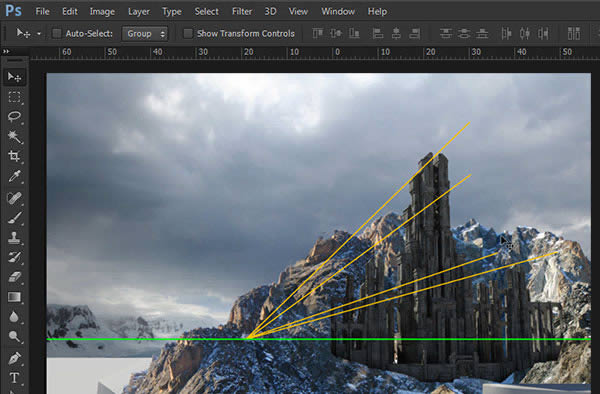
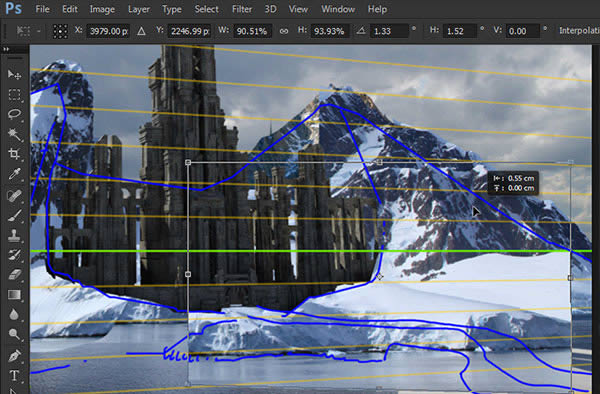
Step 12
Were now moving towards screen right of our painting. Now it’s time to create the second set of vanishing point. Let’s try and create these lines following the edges of the front face of our castle.
Tip: Try to keep your perspective lines and painted
outlines in one folder. That way, you can easily turn them on and off as
a group. At the same time its good practice to create groups for your
elements. A classic group naming would be BG – Background, MG – Midground and FG – Foreground. You can also group each element according to their type e.g. mountain, castle, sky etc.
Step 13
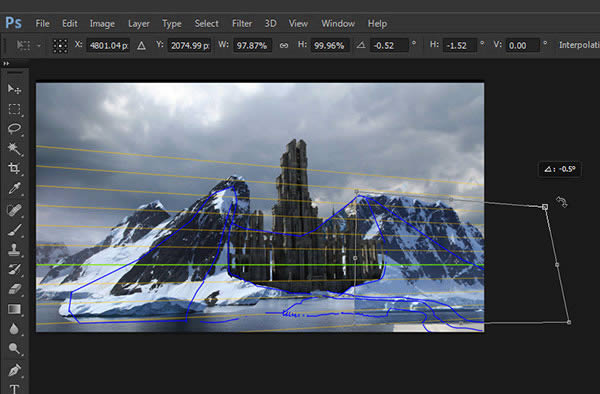
Once that is done, we continue to build upon our painting by importing images from our reference folder and transforming them to fit over the form that we have established.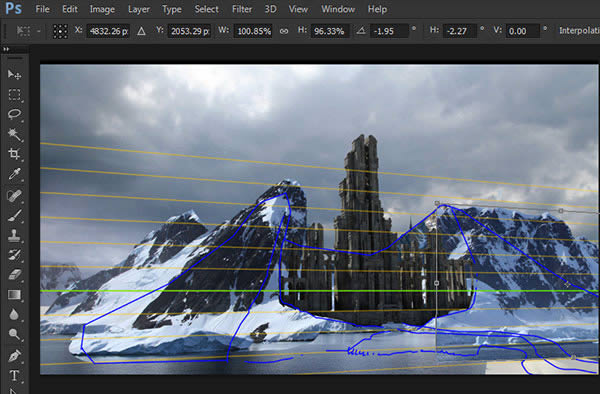
Step 14
We keep on working on the mountain using our second perspective lines as vanishing point. At this point, we are adding the foreground element, creating an entrance to our castle.Since our process is very organic, you can keep on adding elements that you think would work well with the image your building.
Step 15
Add another mountain element on your current painting. Based on your reference 3D image, try to look for a mountain that has a much more rocky surface, or less snow on top. We want to wrap our castle on a hard surface showing how massive and fortified it is in contrast to the snow which is quite soft and clean and volatile.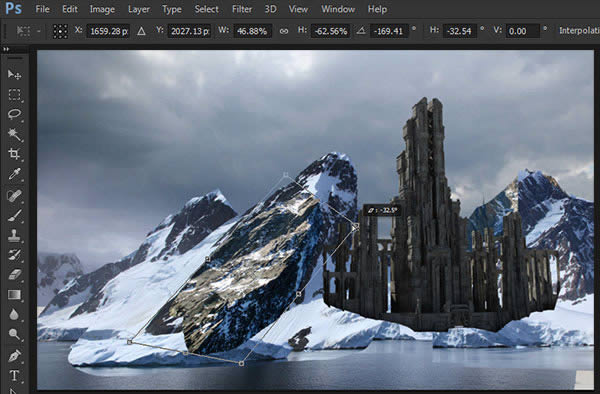
Step 16
Add some tip details to the edges of the mountain. When selecting for the tip on the mountains in your painting, try to look for the ones that are tips themselves. It’s easier to have them match rather than carving a piece of image to make it look like a tip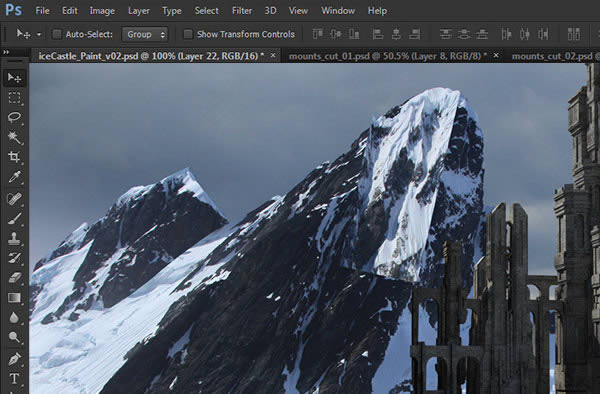


0 komentar:
Posting Komentar